
Ultimate Guide to Securing an iPad as a Kiosk
Ultimate Guide to Securing an iPad as a Kiosk
While Flow Kiosk has relied on iOS’s Guided Access for years, we have discovered the benefit of adding automations with the Shortcuts app. With Shortcuts, you create automations that will make your iPad even more secure in many different, real life scenarios. This post might be longer than our usual, and it might seem complicated (it isn’t – really, seriously, THIS IS NOT HARD), but these instructions will become the ultimate guide to securing an iPad for kiosk mode.
The Ingredients to Securing Your iPad for Public Use and Kiosk Situations
In this guide to securing an iPad for public use as a kiosk, we will give you instructions on how to use three apps together. You will use the Shortcuts app to create automations, the Guided Access setting within Accessibility section of the Settings app, and Flow Kiosk with ‘kiosk mode‘ and the ‘Restart Automatically in Play Mode’ setting.
The Back Story
As the Covid pandemic spread in the last couple of years, in-person events, exhibitions, trade shows and more were all cancelled in most of the world. While things are coming back, a customer of Flow Kiosk reached out with their specific challenge with keeping their iPad secure.
Rosemary is a “non-techy historian just trying to bring more history to the public”. Her project is at the Irish American Heritage Center, which is an old center that shuts down electricity on the weekend to save money and energy at the non-profit organization.
In the past, when the power shut down every weekend, the iPad running Flow Kiosk completely drained and powered down. When the power returned, the iPad relaunched, but in an insecure state.
The way to solve this is to force the iPad back into Flow Kiosk in a ‘single app mode’, ie, Guided Access, and with the presentation launched in Flow Kiosk’s ‘kiosk mode’. [NOTE: You can also use an MDM solution to put the iPad in ‘supervised mode’, but this can be complex for the “non-techy”]
Back in October, 2019, Flow Kiosk introduced the feature to ‘autolaunch’ a Flow in play mode as described here, but we needed some magic and that’s where Shortcuts comes to the rescue.
Guide to Securing an iPad as a Kiosk for Public Use
Step 1 – Using Shortcuts to Create Automations

Grab the iPad that you will use as the kiosk, and launch the Shortcuts app. Within the Shortcuts app, you will be creating at least two personal automations that provide a way to run actions based on events. The first automation will open Flow Kiosk when the Charger connects. The second automation will activate Guided Access after Flow Kiosk launches.
NOTE: You will set up a couple ‘automations’ which cannot be shared like other shortcuts.
When you launch Shortcuts, you will see an icon and the word, “Automations” just below Gallery on the left side of the screen. Tap on Automations and then tap on the “+” above “Have your devices react to changes in conditions” and you will see this below.
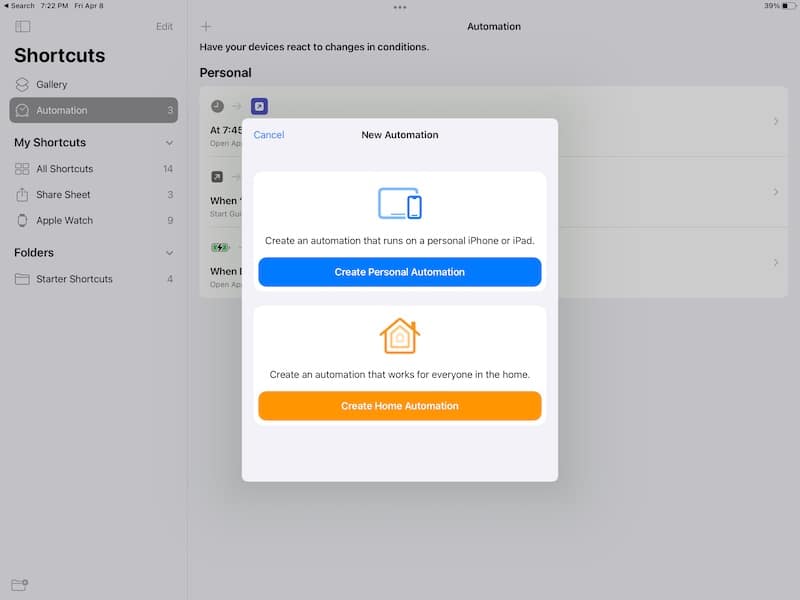
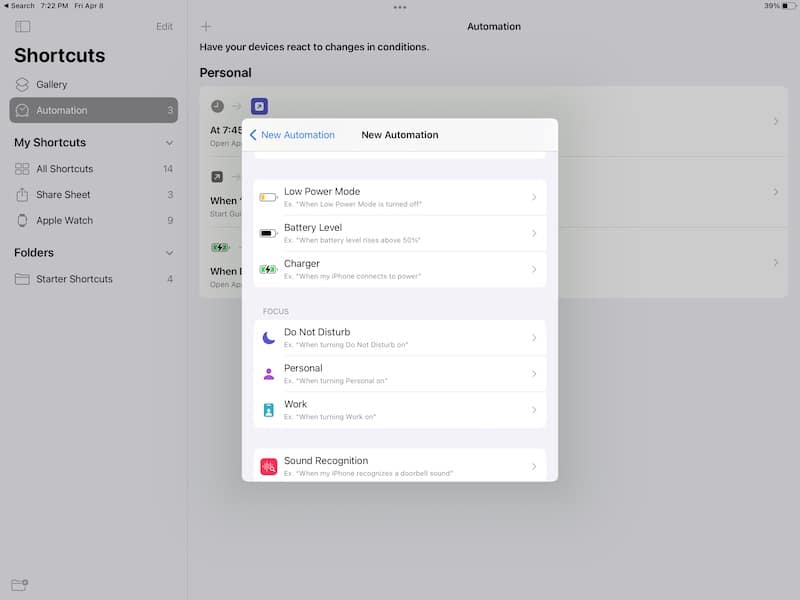
Now, tap on ‘Create Personal Automation’ and you will see this next screen which shows all the system events that you can assign an action. This is a scrollable list, scroll down until you see ‘Charger‘ listed like below.
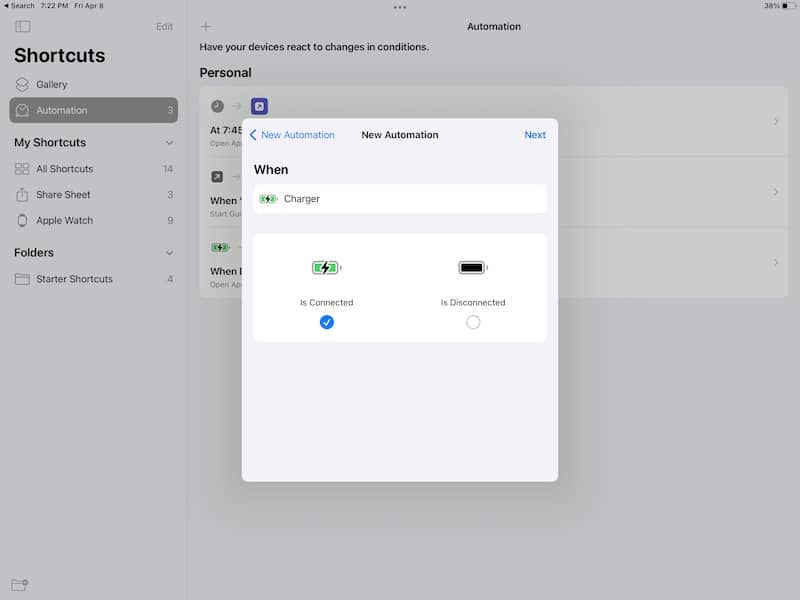
After you choose ‘Charger’, you will see the below screen. Be sure to check the ‘is Connected’ button. This means that you defined the ‘event’ as, “when the Charge is Connected“.
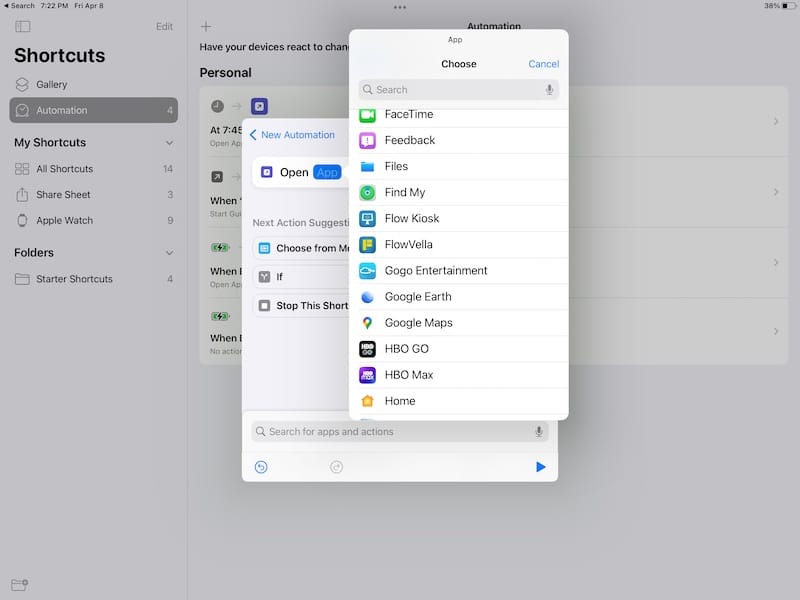
Now that the ‘event’ is set, choose the ‘action’. The action we are choosing is ‘Open App’ and we are going to choose ‘Flow Kiosk’ as the below image.
Here is a link to our “Open Flow Kiosk” shortcut.
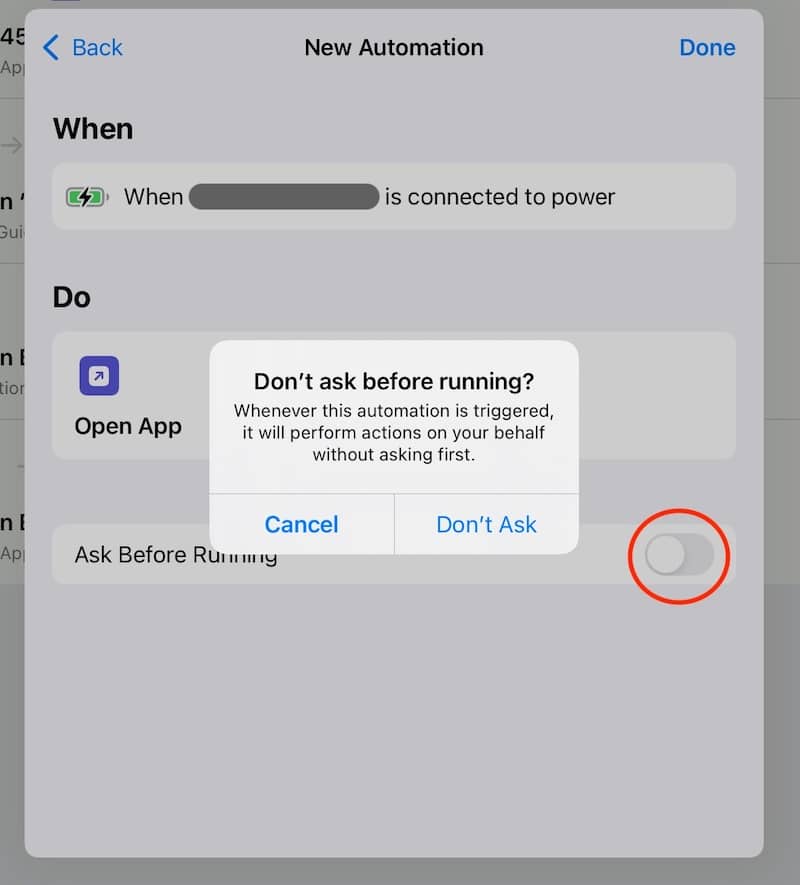
This next step is SUPER IMPORTANT, you need to switch OFF ‘Ask Before Running’. Shortcuts will make you confirm this next step as the below image illustrates. After tapping on “Don’t Ask”, hit the Done button in the upper right and you have the first automation completed! Good job!
Now that we created the automation to launch Flow Kiosk when the Charger “Is Connected”, next is to activate Guided Access after Flow Kiosk opens. Guided Access is a feature of iOS and forces the iPad into only one application.
NOTE – You will need to set up Guided Access and turn it on before this will all work automatically.
NOTE NOTE – Having Guided Access ‘on‘ and ‘activated‘ are NOT the same thing. First, you turn it on and set it up. When you want the iPad in the actual Guided Access state is when it is ‘activated’.
NOTE NOTE NOTE – YOU MUST SET THE GUIDED ACCESS PASSCODE BEFORE THIS AUTOMATION WILL WORK
I’m sure you probably don’t need detailed instructions on creating this next Shortcut automation because you’re an expert now. Regardless, we are feeling extra generous, so here goes.
As before, tap Automations, then the “+” button top, then “Create Personal Automation”.
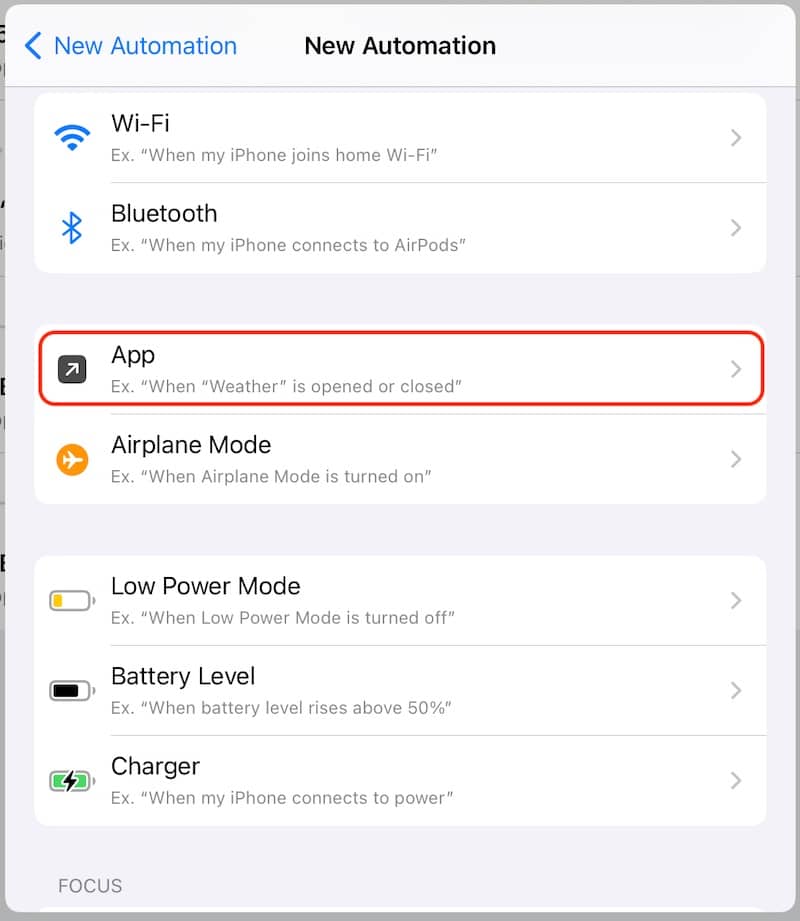
Scroll down and find “App” and tap it as the below image illustrates.
And then check the “Is Opened” and then tap the ‘Choose’ button which will bring up the list of all your Apps like before. Choose Flow Kiosk.
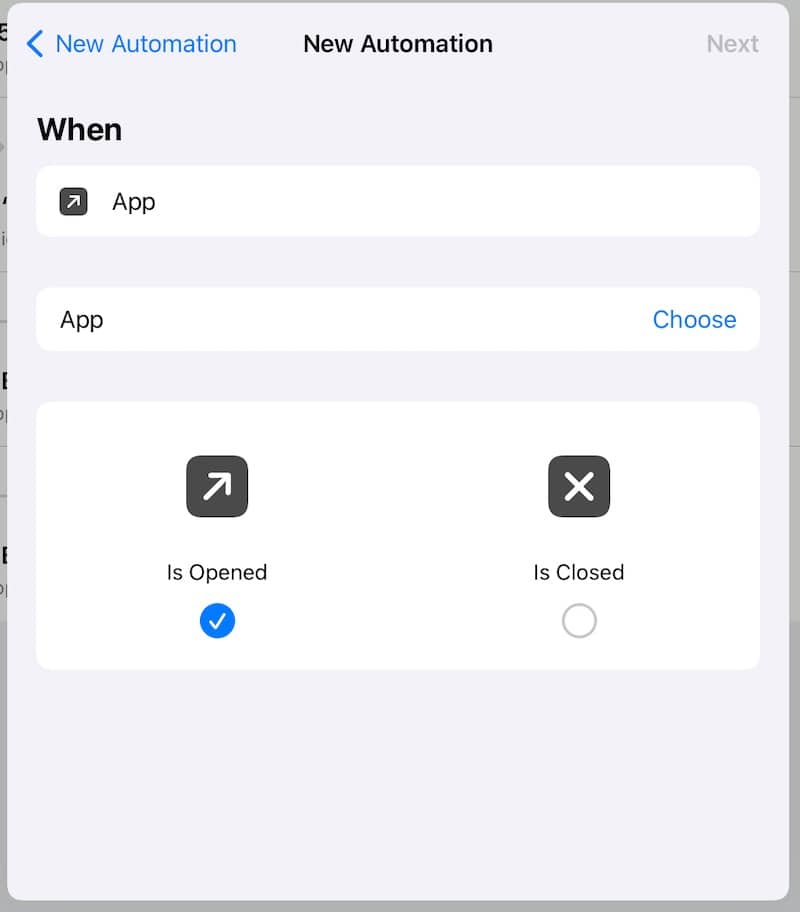
After choosing Flow Kiosk, hit Next. Your “event” is “when Flow Kiosk Is Opened” and now we set the “action”.
Here is a link to our “Start Guided Access” shortcut for your convenience.
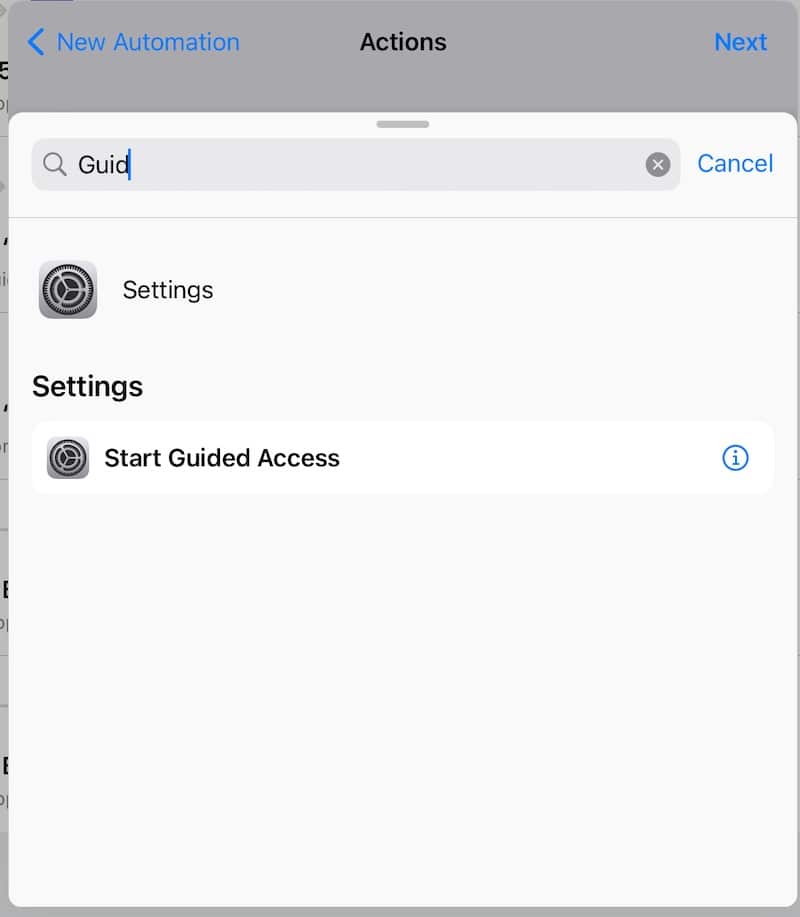
On the next screen, on the bottom, you will see a search bar that says, “Search for apps and actions”. Start to type, “g u i d” for Guided Access and it will appear as the below image shows. Tap on “Start Guided Access” and then “Next”. Then, as before, switch “Ask Before Running” OFF.
That was pretty easy, wasn’t it?
When the Charger/Power connects, your iPad will automatically launch Flow Kiosk. And when Flow Kiosk launches, Guided Access will automatically activate.
Step 2 – Turning on Guided Access on Your iPad
On your iPad, we need to turn on Guided Access and set the passcode so it can activate automagically.
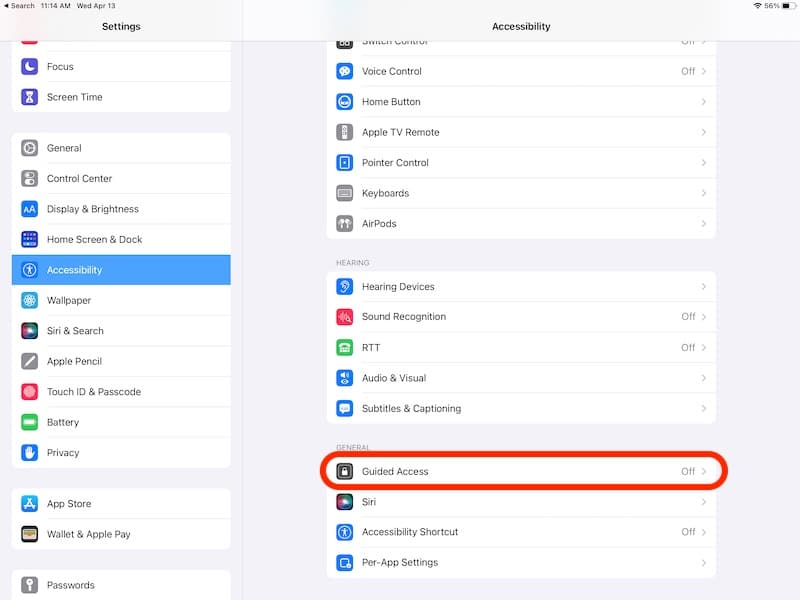
In the Settings app, scroll down and tap on “Accessibility”. And then scroll down on the right towards the bottom and you will see “General” and “Guided Access”. Tap on “Guided Access”.
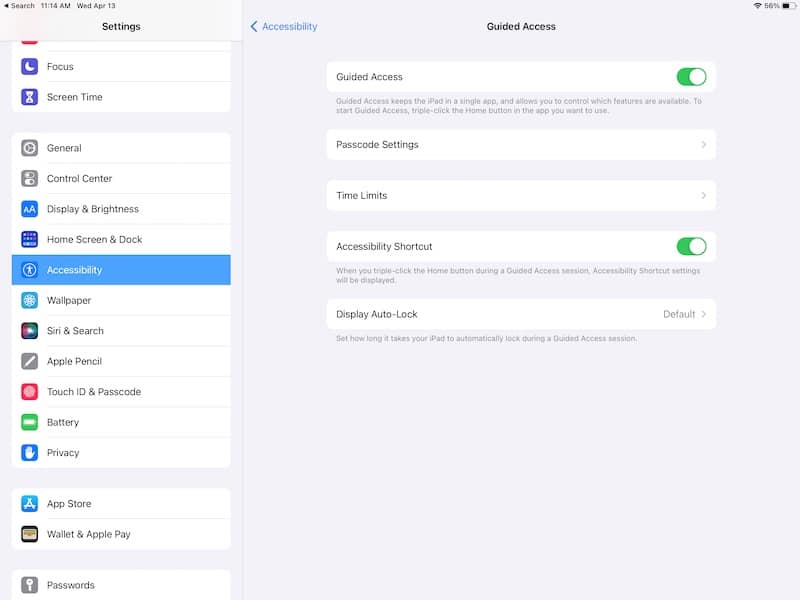
And then, switch on Guided Access, set your passcode to exit Guided Access and I like to turn on the Accessibility Shortcut as well as shown here.
Guided Access is on. We might have wanted to set this up before the Shortcut automations, but those are so cool, we had to introduce those first.
Again, remember to please set up the Guided Access passcode now.
One more step.
Step 3 – Set Flow Kiosk to “Restart Automatically in Play Mode”
Flow Kiosk introduced a new feature/setting a couple of years ago and it just happens to make all this magic come together.
Currently, this setting is actually located in the main Settings app, so you launch the Settings app again.
Scroll down to view all your apps and find Flow Kiosk and tap it.
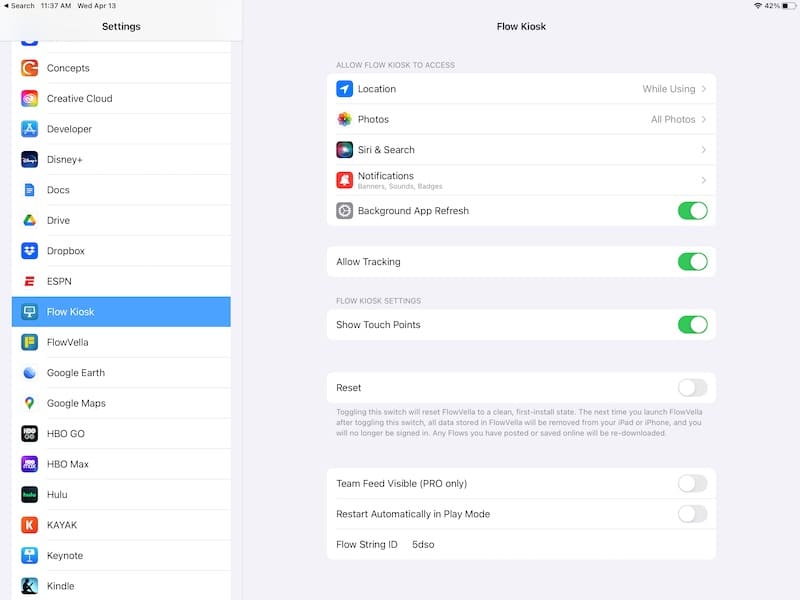
You will see a few settings, but you are looking for “Restart Automatically in Play Mode“.
Switch that on, and then below it, you see “Flow String ID”. This is the 3 or 4 character id of your flow/presentation and is in the URL of your presentation. For example, for flowvella.com/s/5dso, the ‘5dso’ is the Flow String ID. Add the Flow String ID for your presentation and you are ready to rock and roll.
Now, as a test, quit out of Flow Kiosk, and then relaunch it. What happened?
Did you already have the second automation turned on as well? If so, when Flow Kiosk launched, it launched into your flow, and then activated Guided Access.
Is the first automation on? If so, quit out of Flow Kiosk, then plug in the iPad to power and see the magic unfold before your eyes.
If you have any questions on this, please let us know.
We may add to this with other tips that we are thinking to make your iPad secure as a kiosk in multiple, maybe unforeseen situations.
As always, tip your server, and download Flow Kiosk here.